A Vertical Storage Audit for Homes Without Square Footage
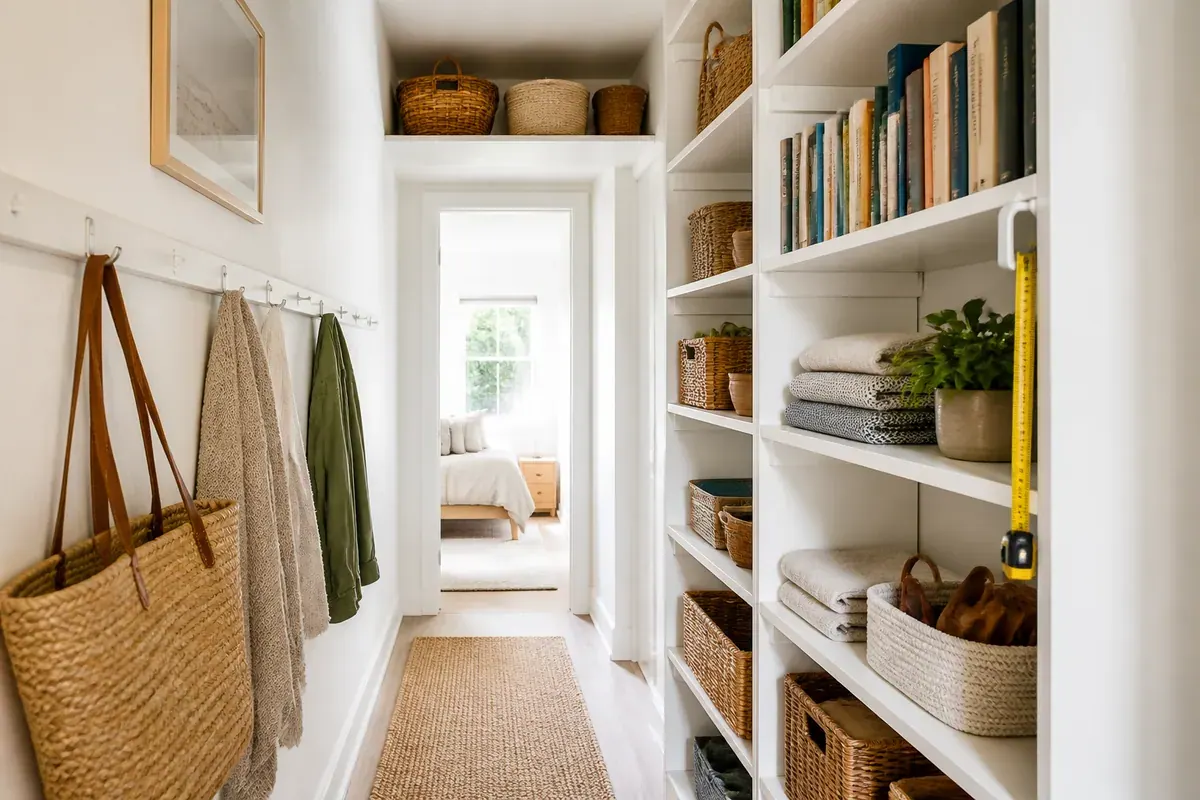
Storage capacity is a wall-area question, not a floor-area question. A 700-square-foot apartment with nine-foot ceilings holds far more than its listing implies, because capacity is square feet of vertical plane multiplied by the depth you are willing to project into the room. Storage in a small home tends to concentrate below 40 inches, leaving the plane above 60 inches close to empty.
The audit below finds that unused volume, prices its structural limits, and decides what earns a place on it. We assembled it from manufacturer load data, framing conventions and published shelf specifications. It runs with a tape measure, a pencil and roughly ninety minutes.
Reading a Room as Four Wall Elevations
A floor plan hides the resource you are hunting. Draw each wall separately instead: one rectangle per wall, as wide as the wall and as tall as the ceiling, four sheets per room. Write the ceiling height in the corner of each sheet. What you end up holding is a map of your actual inventory, measured in square feet of vertical surface.
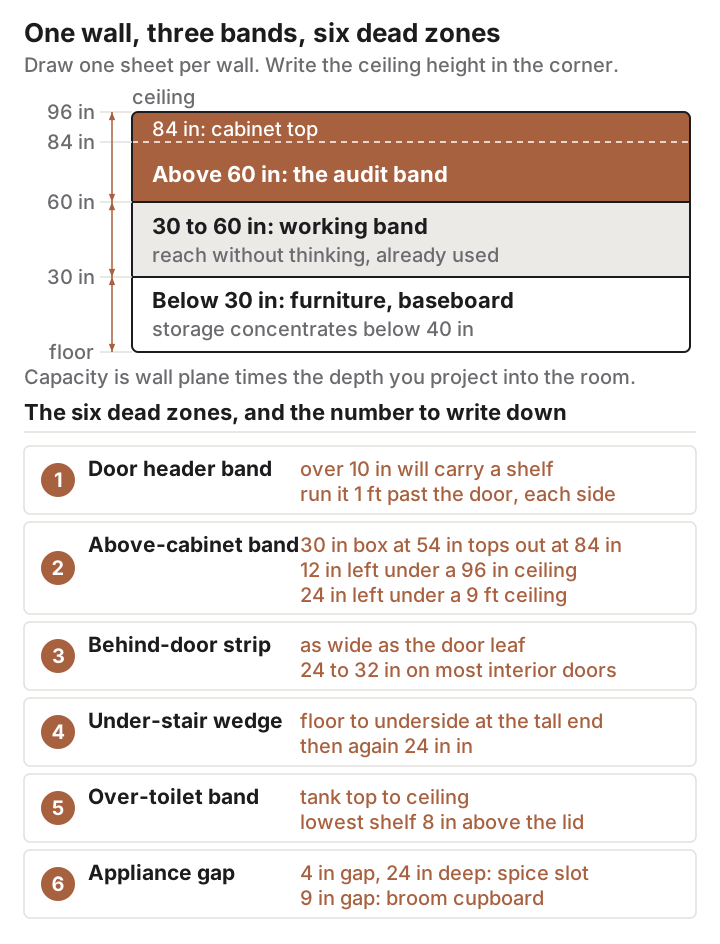
Every wall splits into three bands. Below roughly 30 inches sits furniture and baseboard. Between 30 and 60 inches is the working band, where you reach without thinking and where the available space is usually spoken for already. Above 60 inches is the band this audit is about.
The Dead Zones: Door Headers, Cabinet Tops and the Fridge Gap
Six zones come up again and again once the walls are drawn out. None of them show up on a floor plan, and none of them cost floor area to use.
Above the Door Casing and Above the Upper Cabinets
Measure from the door casing’s top edge up to the ceiling and write the number down. Anything over 10 inches will carry a shelf, and the run can continue past the doorway by a foot on either side without crowding the door swing. Kitchens hide a second version of the same band above the upper cabinets. Standard 30-inch wall cabinets hung 54 inches off the floor top out at 84 inches, which leaves 12 inches under a 96-inch ceiling and 24 inches under a nine-foot one.
That kitchen gap is deep as well as tall. Wall cabinet boxes usually run around 12 inches front to back, so a shelf sitting on top can match the cabinet depth exactly and read as casework rather than as an addition.
Behind Doors, Under Stairs and Beside the Refrigerator
Open every interior door fully and look at the wall it lands against. The strip behind a swung-open door matches the width of the door leaf, so 24 to 32 inches on most interior doors. It sits outside the room’s normal sightline, and will take a shallow shelf column or a rail of hooks. Under a staircase, the usable volume is a wedge: measure the floor-to-underside height at the tall end and again at a point 24 inches in, and you will know whether you are building drawers or a cabinet.
Beside the refrigerator, measure two numbers. First the gap between the appliance and the adjacent wall or cabinet run, then the depth from the back wall to the front face of the fridge. A 4-inch gap that runs 24 inches deep is a spice or sheet-pan slot; a 9-inch gap is a narrow broom cupboard.
The wall above a toilet tank is easy to overlook and simple to reclaim. Measure from the top of the tank to the ceiling, then hold your lowest shelf at least 8 inches above the tank lid so the lid still lifts clear.
Running the Vertical Storage Audit in Nine Steps
- Draw four elevations per room. Record the wall’s clear width and its floor-to-ceiling height on each sheet.
- Mark every fixed obstruction. Windows, door swings, outlets, switches, thermostats, supply registers, radiators. Write the height off the floor of each one, since those numbers set your shelf lines before aesthetics do.
- Measure the six dead zones. Door header band, above-cabinet band, behind-door strip, under-stair wedge, over-toilet band, appliance gap. Write width, height and usable depth for each.
- Find and record the stud centerlines. Mark them in inches from one room corner, so the drawing survives after the pencil marks get painted over.
- Flag the do-not-drill stripes. Draw a vertical no-go band above and below every outlet and switch, and treat any wall behind a plumbing fixture as suspect. Wiring and supply lines share the cavity you are about to open.
- Weigh one linear foot of the contents. Load a tote bag with a foot of the books, cans or towels headed for that shelf, put it on a bathroom scale, and write down the pounds per linear foot.
- Assign a fastener to every run. Compare the weight from step 6 against the anchor table below, then note the chosen fastener on the elevation drawing rather than trusting memory.
- Set depth from the contents, not from the shelf you liked. Use the depth table below and write the depth on each run.
- Rank the candidates and record the rejections. Score each proposed run by how often its contents get used, and write one sentence explaining every zone you chose to leave empty. That sentence is what stops you auditing the same wall again in six months.
A stud finder earns its price at step 4. Franklin Sensors’ ProSensor 710 carries 13 sensors, so it lights a stud across its entire width in one pass rather than beeping at a single edge. Detection depth is stated at 1.6 inches, and the listed price is $52.95. Cheaper single-sensor units work, but they ask you to interpolate, and interpolation is how shelves end up hanging on paper.
Stud Centerlines and Anchor Ratings
Once you have two centerlines, the spacing usually predicts the rest. Residential code tables list maximum wood stud spacing at 16 or 24 inches on center depending on stud size and what the wall carries, so a wall that reads 16 inches at one end will normally hold that rhythm. If it does not, mark the wall irregular on your drawing and plan for anchors instead of arguing with the framing.
The number worth memorizing belongs to the toggle. TOGGLER rates its SNAPTOGGLE heavy-duty toggle bolt at up to 238 pounds in half-inch drywall and 802 pounds in concrete, and it needs only 1-7/8 inches of clearance behind the wall to swing its channel open. It comes in thread sizes from 3/16-24 up to 1/2-13. Those are laboratory maximums under ideal conditions, so read them as ceilings and design well underneath them.
| Fastener | What it grips | Load guidance | Where it belongs in the audit |
|---|---|---|---|
| #10 wood screw into a stud | The 1-1/2 inch face of the framing lumber | Governed by the bracket and shelf, not by the wall | Book runs, pantry shelves, anything over 20 lb per linear foot |
| Toggle bolt (SNAPTOGGLE type) | The back face of the drywall, spread wide | Up to 238 lb per anchor in 1/2 in drywall | Heavy runs on a wall where no stud lands where you need it |
| Self-drilling threaded anchor | Threads cut into the gypsum core | Printed on the package; read it before you buy | Light shelves, hooks, towel bars, over-toilet frames |
| Flanged plastic expansion anchor | Friction inside the drilled hole | Printed on the package; the lowest of the four | Picture ledges, single hooks, nothing structural |
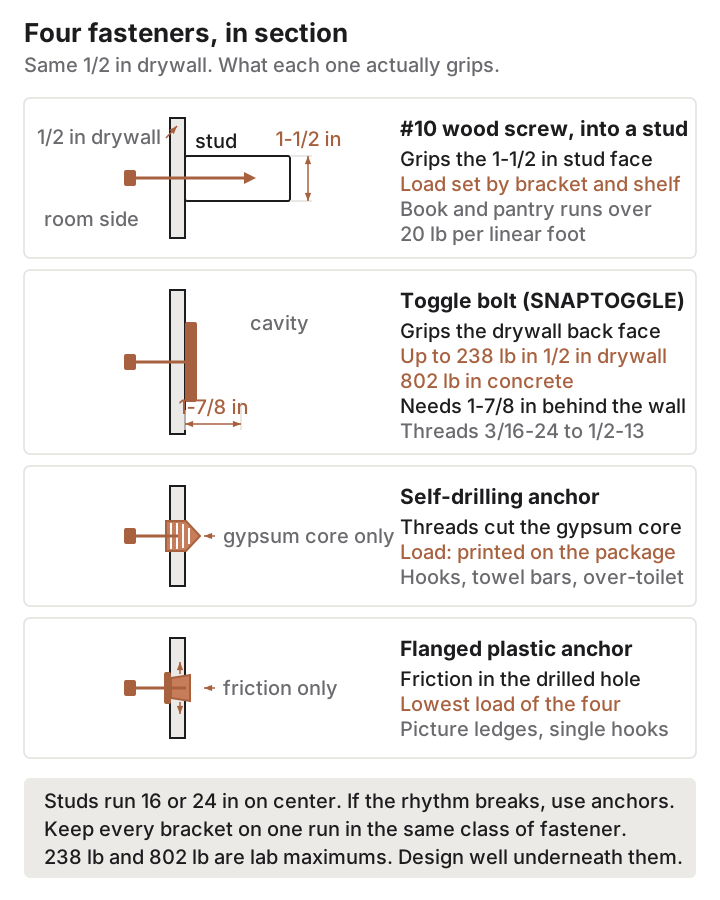
Mixed fastening is the common failure. A shelf that catches one stud and floats its other bracket on a plastic anchor holds beautifully until the loaded end pulls out. Keep every bracket on a run in the same class of fastener; where a run crosses a stud line and then leaves it, use toggles at both ends.
Setting Shelf Depth by What the Shelf Will Hold
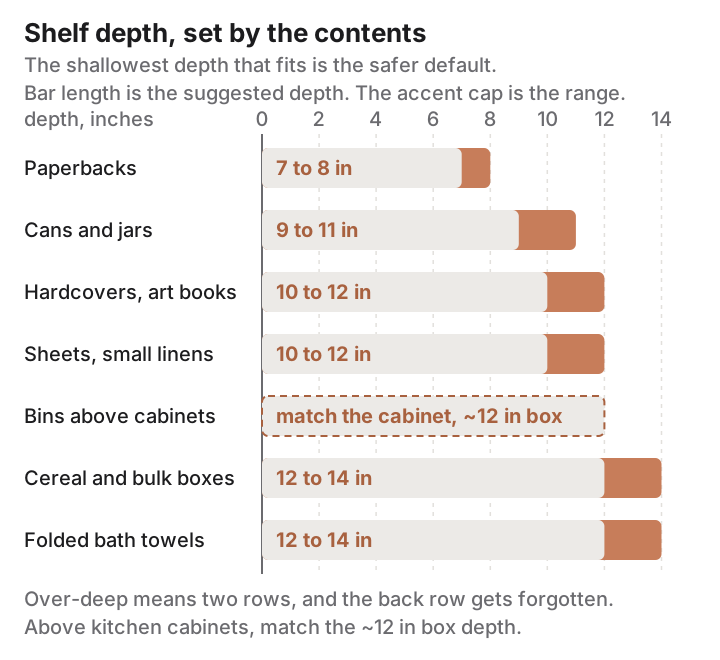
Depth decides two things: whether the contents fit front to back, and whether you can see the back row. The shallowest depth that fits the object is the safer default, because an over-deep shelf becomes a two-row shelf, and the back row turns into storage you have forgotten you own.
| Contents | Suggested depth | Reasoning |
|---|---|---|
| Paperbacks | 7 to 8 in | Spines sit flush; nothing tips forward |
| Hardcovers and art books | 10 to 12 in | Large-format covers overhang a 9-inch shelf |
| Cans and jars | 9 to 11 in | Two rows deep at most, so labels stay readable |
| Cereal boxes and bulk containers | 12 to 14 in | Tall boxes need footprint or they topple |
| Folded bath towels | 12 to 14 in | A folded bath sheet is deeper than most people expect |
| Sheets and small linens | 10 to 12 in | Folded flat sheets sit shallower than towels |
| Bins above kitchen cabinets | Match the cabinet depth | The face aligns with the casework instead of stepping out |
Rated capacity and apparent sturdiness are unrelated. IKEA’s BERGSHULT / GRANHULT wall shelf measures 31-1/2 by 7-7/8 inches, carries a stated maximum load of 22 pounds, and sells for $30. Divide across that span and you get roughly 8 pounds per linear foot, which is a photo ledge rather than a bookshelf.
Compare that with a shelving-system component. The pine IVAR shelf measures 32-5/8 by 11-3/4 by 3/4 inches, carries a stated maximum load of 77 pounds, and lists at $12 against a regular price of $15. It rests in IVAR side units rather than on brackets, so it is a different installation, but hold the numbers side by side: near-identical span, three and a half times the rated load, under half the price.
Deciding Which Objects Earn Wall Space
Three tests settle most arguments. Frequency comes first: weekly items belong between 30 and 60 inches, monthly items go above 60 or below 30, and annual items take the highest band or the deep end of the under-stair wedge. Put the holiday platters at 84 inches and the coffee beans at 54, never the reverse.
Weight comes second, and it overrides frequency. Anything heavy enough to injure someone should sit on studs, sit low, or sit somewhere else entirely. A run at 80 inches carrying cast iron is a bad idea even when the anchors are rated for it.
Appearance comes third, because anything above 60 inches is permanently in the room’s sightline. Matched bins read as architecture; a mixed stack of cardboard and old shoeboxes reads as clutter. Budget for the containers when you budget for the shelf, or the wall will look worse than the closet it replaced.
Then write down what you rejected. A zone left empty for door clearance, radiator heat or sightlines is a decision, and recording it keeps the audit from becoming an annual argument with yourself.
Rerunning the Audit: The Life Changes That Reset the Walls
Run the full audit once, then re-run it on events rather than on a calendar. The wall does not change on its own, so a scheduled review mostly produces churn.
The events that genuinely reset the drawings are specific. Moving house, obviously. A new occupant, whether that is a roommate, a partner or a baby. A child crossing a size threshold, since the shelf that held board books will not hold instrument cases.
Work and storage changes count as well. A job that starts sending equipment home fills a wall quickly. So does giving up a storage unit, a garage bay or a parent’s attic, which is the largest single volume shock most households absorb.
A kitchen or bathroom renovation resets the cabinet lines and therefore the above-cabinet band. So does a new appliance, since a replacement refrigerator rarely leaves the same gap beside it. Lease renewal is worth one look too, since you are already weighing another year against a wall of patched anchor holes.
Between those events, one sheet per wall in a folder is enough. The elevations hold their value as long as the stud centerlines and the do-not-drill stripes stay accurate, and those only change when the walls do.